"Early Spring in the 472nd year after the birth of our Blessed Saviour Lord Jesus Christ.
On this day, the forces of the Tribune Lord Andrucius did engage a band of heathen Saex who did attempt to raid the farmestead of the freeman Bleddig, whose lands lie in the East of the province of Caer Lind Colun, but a short march from the sea.
The Tribune's forces came upon the enemy as they were entering the freeman's farm. 'Tis indeed fortunate that the goodly farmer had wind of their foul presence and enabled the escape of his entire family into surrounding woodland. According to both the Lord Andrucius and the Decurio Geraint, this was largely due to the stench of the heathens' unwashed bodies and also to the hideously loud and guttural noises made by one of the enemy lords which alerted the freeman and his entire family. Decurio Geraint, who has some limited knowledge of the Saex tongue, doth inform me that this was the Saex equivalent of 'song' performed by a brute who was in no small measure inebriated and that he would not furnish me with more detail of the lyric lest he offend my delicate sensbilities. Wisely, I did not pursue the matter...
The Tribune's report stated that the the forces of our kingdom fought bravely against the onslaught of the heathen, but that, due to the difficulty of terrain, the Saex had the edge throughout the early stages of the encounter. This was also apparently enhanced by the brutes' habit of stepping forth with loud, foul and dastardly taunting of the Lord Andrucius' bodyguard. Apparently, the British tongue was not spoken well by the heathen, but by dint of hand gesture (and other bodily parts which I shall not mention) the gist of the insults were only too clear, leaving the goaded hearthguard unable to support their warrior bretheren in combat for some goodly part of the fight.
Thus, things did seem bleak until the Lord Andrucius, finally clearing his mind of the heathens' curses, and with his valiant hearthguard howling in battle rage beside him, launched a series of devastating assaults on the Saex Lord's own hearthguard units, putting both to ignominious flight at only trifling loss to his own elite guard. This turned the tables on the foe, who were celebrating the rout of the milites in the Tribune's force with further raucous 'song' and insults. Both the Decurio Geraint and the Lord's Champion Bedwyr are to be mentioned in dispatches to his majesty King Mascuidius for valiantly fighting against the odds for much of the conflict, the Decurio gaining a small and insignifcant wound in the process as his milites withdrew from the field.
Maximus Minimus shall not be mentioned as his entire role in the fight was to march the levy inconsequentially around the field, apparently searching for the enemy. Still, we must not judge the young man too harshly - at the very least, he did not get any of them killed!
Thus the conflict ended, as the Saex found nothing of any value in any part of Bleddig's farm and withdrew from the fight before more of their men were sent to cross the bridge of swords to the halls of their heathen dead. The Tribune Lord Andrucius was content to let them go, with the clear, well-formed and vigorously shouted taunts of our brave soldiers ringing in their ears!
A victory! Praise be to our Lord and Blessed Saviour!!
The Tribune informs me that our losses will be made good in but one cycle of the moon and that it will be yet another again before the Saex will have the strength to come at us once more. Yet we must remain vigilant, for come again they surely must! Their Lord will now know the name of our Tribune who has vanquished him and will be calling for revenge. The Saex will return. That we know for certain. What their next move will be, only their heathen gods will know.
This is a true and accurate account of the action at Bleddig's Farm, written by mine own hand.
Publicus Librarius - Scribe to his most royal majesty King Mascuidius of Linnius"
Monday, 10 September 2012

Friday, 7 September 2012
Dux Bellorum bases have arrived!
You have to hand it to Martin and Diane at Warbases...they don't hang about and they do GREAT stuff!! I emailed them last weekend about doing me some sabot bases to use my Arthurians with Dan Mersey's 'Dux Bellorum' rules and, within a few hours, I had a quote. Mere days later, I have my bases! Excellent service and quality product once again!! Please use them for your basing requirements and do feel free to tell them I sent you!! :-)
Anyway, I now have enough bases to do either a Romano-British or a Welsh army...all the more reason to get that Welsh noble cavalry finished!!.
I designed the bases myself and sent Martin a drawing for each type of base I required. These are attached below. If any of you want them to order yourselves some, please email me and I'll zip the files to you (Microsoft Publisher or PDF).
Each base is 120mm x 80mm and, when we game, we are going to equate one vase-width (the standard rules measurement distance) as 4", so if something has a move of 2 base widths in the rules, we'll simply multiply 4" by 2... This means we can use decent numbers of models in our armies (I can't stand those DBwotsit armies with about 10 figurse in the entire force!) and play on a standard club 6x4 foot table. Thanks to Steve Jones, whose idea we are shamelesly stealing!!!

 This weekend, it's all about sticking on the sand and static grass ready for a game in a couple of weeks. Watch this space for a battle report and pics!!
Of course, the fact that the skirmisher and cavalry bases have four models each is also very handy for Dux Britanniarum too, as those are the unit sizes for cavalry and skirmishers...handy that!!!
Anyway, I now have enough bases to do either a Romano-British or a Welsh army...all the more reason to get that Welsh noble cavalry finished!!.
I designed the bases myself and sent Martin a drawing for each type of base I required. These are attached below. If any of you want them to order yourselves some, please email me and I'll zip the files to you (Microsoft Publisher or PDF).
Each base is 120mm x 80mm and, when we game, we are going to equate one vase-width (the standard rules measurement distance) as 4", so if something has a move of 2 base widths in the rules, we'll simply multiply 4" by 2... This means we can use decent numbers of models in our armies (I can't stand those DBwotsit armies with about 10 figurse in the entire force!) and play on a standard club 6x4 foot table. Thanks to Steve Jones, whose idea we are shamelesly stealing!!!


Of course, the fact that the skirmisher and cavalry bases have four models each is also very handy for Dux Britanniarum too, as those are the unit sizes for cavalry and skirmishers...handy that!!!
Thursday, 6 September 2012
Dux Britanniarum -The Annals of Linnius: Prologue
"These words are a true and lasting record of the events from this day forward in the kingdom of Linnius. I, Publicus Librarius, chief scribe and loyal servant of Mascuidius, Overlord of Linnius, take it upon myself to record the events of this time, for I fear that we may be setting out on a long and painful journey into the darkness, like so many of our fellow Britons since the legions of Rome departed many years ago. These words must serve as a light in times of future darkness, so that men may know that we fought to preserve what is ours and that this land comes at a price to those who would take it from us.
It is now early spring in the 472nd year after the birth of our Lord and Blessed Saviour, Jesus Christ, and the world that we know and have known for many generations is changed. In recent weeks, portents of doom have struck our small kingdom. Farms lying nearest to the coast of the Saxon Sea have been burned, the families cruelly slaughtered, cattle and other goods stolen. Dark-sailed ships have been seen prowling the coasts in greater numbers than ever before. Sea-born trade from the kingdoms of Aegidius and Syagrius in Gaul, from the lands of the Bretons and from the kingdoms of the Visigoths and Franks has slowed and all communication from the officials of what remains of the Empire of the West has ceased.
From this, we must deduce that the dreaded heathen Saex have, at last, come to our lands, seeking to steal them from us, to enslave our people and to extinguish the light of civilization from our world. From whence they come, we know not. Some say these are raiders from the Anglian lands to the North, where the land of Deira is held by the Angles and that they come via the great Northern river called the Humber. Others say that the raiders come from across the Saxon Sea where warlords compete for land, power and glory and see in us the chance for that glory...
Whichever is the true fact is not important. The fact remains that the Saex are come to our world and that we must prepare for a long, hard fight.
Our forces are prepared. The Tribune, Lord Andrucius prepares the army and has sent out the call for the local militia to take up arms and prepare to defend their homes. Whoever they are, these Saex need to know that the kingdom of Linnius will not descend into the darkness without a fight..."
It is now early spring in the 472nd year after the birth of our Lord and Blessed Saviour, Jesus Christ, and the world that we know and have known for many generations is changed. In recent weeks, portents of doom have struck our small kingdom. Farms lying nearest to the coast of the Saxon Sea have been burned, the families cruelly slaughtered, cattle and other goods stolen. Dark-sailed ships have been seen prowling the coasts in greater numbers than ever before. Sea-born trade from the kingdoms of Aegidius and Syagrius in Gaul, from the lands of the Bretons and from the kingdoms of the Visigoths and Franks has slowed and all communication from the officials of what remains of the Empire of the West has ceased.
From this, we must deduce that the dreaded heathen Saex have, at last, come to our lands, seeking to steal them from us, to enslave our people and to extinguish the light of civilization from our world. From whence they come, we know not. Some say these are raiders from the Anglian lands to the North, where the land of Deira is held by the Angles and that they come via the great Northern river called the Humber. Others say that the raiders come from across the Saxon Sea where warlords compete for land, power and glory and see in us the chance for that glory...
Whichever is the true fact is not important. The fact remains that the Saex are come to our world and that we must prepare for a long, hard fight.
Our forces are prepared. The Tribune, Lord Andrucius prepares the army and has sent out the call for the local militia to take up arms and prepare to defend their homes. Whoever they are, these Saex need to know that the kingdom of Linnius will not descend into the darkness without a fight..."
Tuesday, 4 September 2012
BIG Games - Newbury and Catraeth (Y Gododdin)
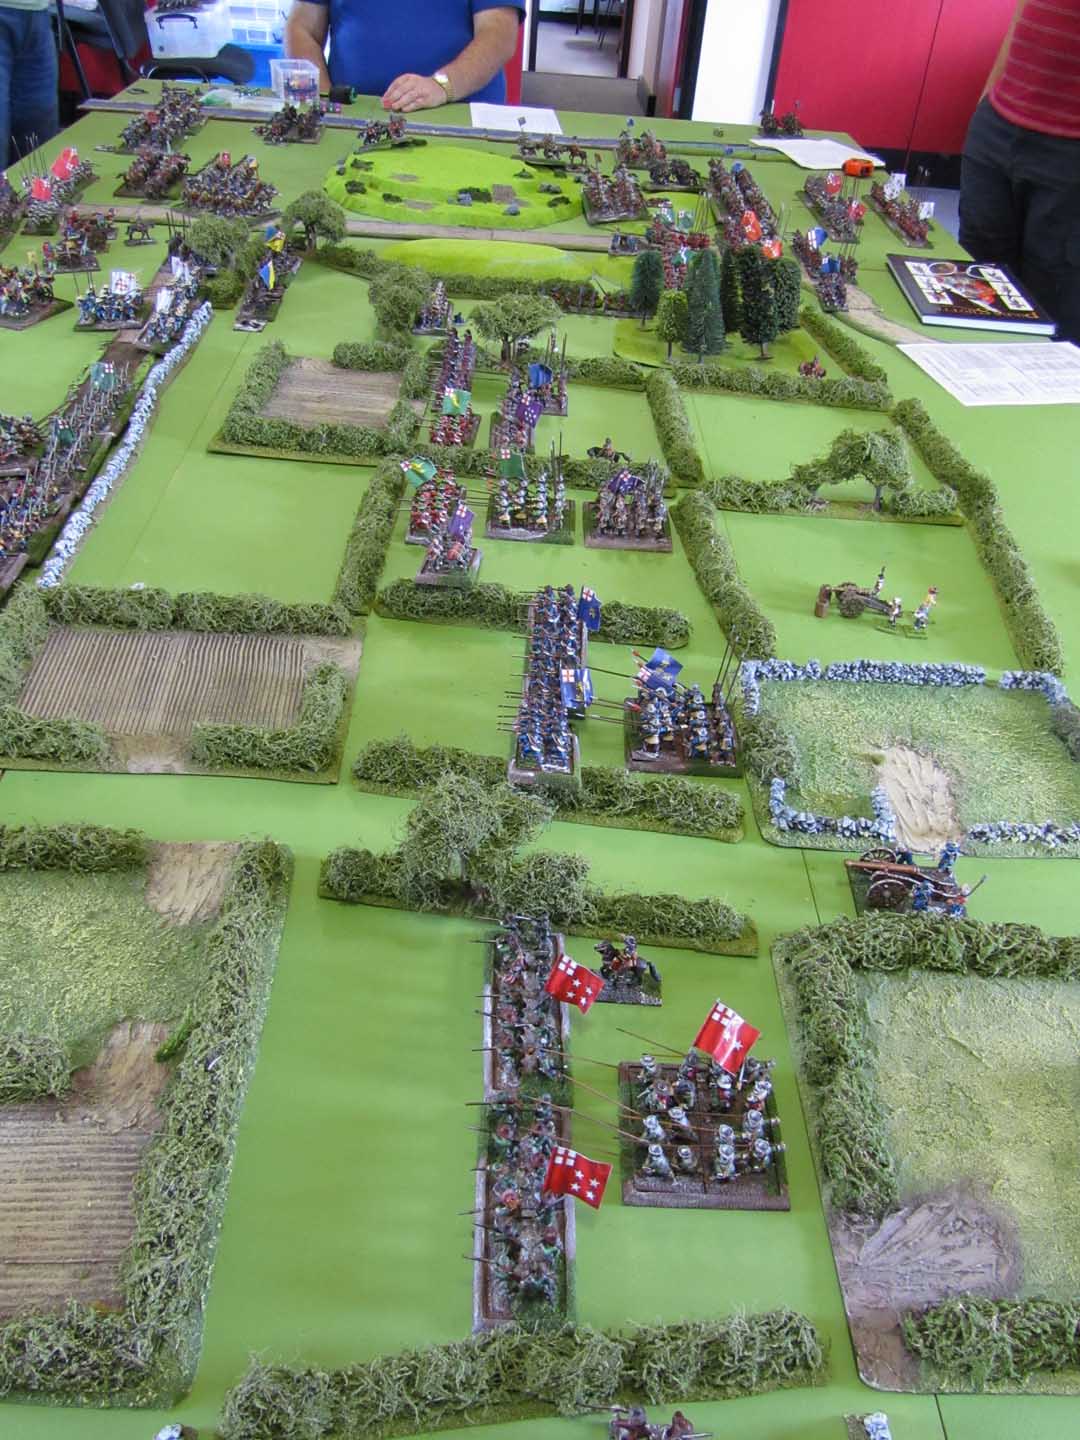
In the past two weeks I have been fortunate enough to take part in two BIG games! The first was an all-dayer at the club, led by Carl Fisher and involving Mike Whitaker and Gary (chaps from the ECW campaign running at the club, of which more on Mike's blog). This game used Gary's models (give or take a unit...the man has too many models!) and the Pike & Shotte rules and was a re-fight of first Newbury. Now, I know less than b*gger all about ECW, but nonetheless am really enjoying the campaign and had a real blast at the all day game, managing to help secure a Parliamentarian victory by resolutely advancing across all the fields that actually exist outside Newbury, effectively pinning the Royalist right while my boss (Gary - Earl of Essex) trashed the much better and more numerous Royalsit cavalry and basically did all the hard work!!! He was assisted by the fact that Mike did a bit of superb role-playing as Pwince Wupert, launching an impetuous cavalry charge that, had it worked, would have meant curtains for Parliament. However, it didn't and it was the Royalist cavalry commands breaking that secured the victory.
Parliament deployment below - my foot commands who were tasked with securing the bridge by advancing across the fields and hedgerows of middle England...oh joy!!
 Below, Royalist right flank opposing me...
 Royalist cavalry below...
 Parliament cavalry...outclassed and outnumbered...but still kicked ass!!!
 My advance...steady as we go lads...trudge, trudge...
 The ECW equivalent of trench warfare. I was coming out on top in this firefight, but only just...it was soon after this point that the Earl of Essex got himself captured (doh!) while his right flank rendered the Royalist position untenable as vast hordes of Parliament troops were about to outflank their line on the right....VICTORY!!

So, that was fun!!!
Now to last Sunday where I joined Sir James of Morris and several chums (Age of Arfur's Steve Jones, Tom and Scrivs, plus Andy McT and Matt) to re-run the mahoosive 'Hail Caesar' refight of the Battle of Catraeth as immortalised in the Dark Age British poem 'Y Gododdin'. This is the one that will appear in Wargames Illustrated's 300th issue in October (we saw the article proof on Sunday...you NEED to buy the mag for this alone (and the other articles will be just as good, trust me!)
Anyway, Sunday saw us take the game to 'The Other Partizan' at Newark. We were slap bang in the middle of the hall next to Simon 'Bigredbat' and Phil Hendry's superb Ad Castores Roman civil war game (@Phil and Simon: sorry I didn't get to chat more than 2 mins to either of you...the game took all of my attention apart from enough time to much a jacket potato and buy a few bits and bobs...)
I took my usual place on the British left and was joined by James and Steve as fellow Britons. Basically, our scenario was as follows (hopefully this enlarges enough to read!):
 As heroic and glorious death was the order of the day, we attempted to do just that, only to be thwarted by failed command rolls and stupendous Saxon saving throws. I came last (b*gger all glory!) with the day being well and truly won by Tom whose Saxons kicked our butts quite royally!! Nonetheless, this was one of the best games I have ever been involved in. With over 1000 beautifully painted models on the table, it was quite a spectatcle and the interest we provoked in the punters was, understandably, high!! To all who came over, I hope that you found us all appropriately friendly, knowledgeable and helpful.
A few pics below (I gave up after lunch as fatigue set in...just buy the mag in October as WI's Dan F takes MUCH better pics than me anyway!!)
Full deployment below...
 My models. Note the three new banner bearers. The chap with the yellow banner will be standard bearer in the full unit of Gododdin Teulu I am painting for WAB/Saga/Dux Brit/Dux Bellorum and which are on my painting table as we speak.
 View of the Saxon lines from behind my position below...
 Below: the attack goes in...just before it all went dreadfully 'Pete Tong'... Steve Jones looking unconcerned (his Companion cavalry were our best unit, mauling the Saxon left and actually cutting a path of escape, but valiantly returning to die with their comrades...)
 I hope you enjoyed these tales of BIG gaming. I heartliy recommend the Hail Caesar and Pike & Shotte rules to all of you. Gather some mates and put on a BIG game of your own...you won't regret it! :-)
Next up, the Dux Britanniarum campaign for Linnius begins!!!
Parliament deployment below - my foot commands who were tasked with securing the bridge by advancing across the fields and hedgerows of middle England...oh joy!!



So, that was fun!!!
Now to last Sunday where I joined Sir James of Morris and several chums (Age of Arfur's Steve Jones, Tom and Scrivs, plus Andy McT and Matt) to re-run the mahoosive 'Hail Caesar' refight of the Battle of Catraeth as immortalised in the Dark Age British poem 'Y Gododdin'. This is the one that will appear in Wargames Illustrated's 300th issue in October (we saw the article proof on Sunday...you NEED to buy the mag for this alone (and the other articles will be just as good, trust me!)
Anyway, Sunday saw us take the game to 'The Other Partizan' at Newark. We were slap bang in the middle of the hall next to Simon 'Bigredbat' and Phil Hendry's superb Ad Castores Roman civil war game (@Phil and Simon: sorry I didn't get to chat more than 2 mins to either of you...the game took all of my attention apart from enough time to much a jacket potato and buy a few bits and bobs...)
I took my usual place on the British left and was joined by James and Steve as fellow Britons. Basically, our scenario was as follows (hopefully this enlarges enough to read!):

A few pics below (I gave up after lunch as fatigue set in...just buy the mag in October as WI's Dan F takes MUCH better pics than me anyway!!)
Full deployment below...


Next up, the Dux Britanniarum campaign for Linnius begins!!!
Tuesday, 21 August 2012
Second Game of Dux Brit
Last night saw a fabulous event at Peterborough Wargames Club...The mighty 'Dux Britanniarum' himself, Lord Richard of Clarke, visited us to umpire a game of Dux Brit between Mike 'Trouble At' Mill' Whitaker and myself. An honoured guest indeed!!! And what a great time we all had!! Mike has already blogged his version of events. My mind is a bit hazy on the order of some of what happened as I was trying so hard (and managing!) to keep up with game mechanics as well as play and take pics, but here goes...
Right...first, we set up the terrain. This was interesting, as we rolled an unfathomably unusual set of dice resulting in the most terrain-heavy battlefield Rich had ever seen on a Dux Brit table. This was to be my undoing, as we shall see later, although I contributed to my own downfall by not taking advantage of the opportunity to move 2 terrain pieces at the start of the game...well, I did move two, but the wrong two and in the wrong direction..hey ho... Still, pretty looking table, isn't it? My Dark Age terrain is rather nice...
 Below the first turn of the game. We rolled for a village raid...actually no...that;'s a lie...we fabricated the roll for a village raid, as we couldn't do a cattle raid cos we played it last time, we couldn't do a wagon train raid cos my wagons aren't painted...yada, yada, so Rich stepped in...a raid on a village it would be (the village of Mill-ton on Kay-nes. Apparently, the Saxons had tried to raid it before, but it had been closed...! Bizarrely, they had decided to have another bash...contrary, these Germanic types!) Anyway, Mike rolled a 'one' for how many turns start he got in his attempt to loot Mill-ton on Kay-nes and I rolled a 4 bringing me on at the far end of the table (b*gger!), although mercifully in a space devoid of too much terrain!
 Below my army at the end of turn 2, with the remaining troops catching up with my vanguard. My plan was to use my best troops to tackle the threat to the village and the rest to screen off the ford, as some Saxons were trying to sneak round that way...canny blighters!
 And here they come...sneakin'...led by some drunkard called Leofric, whose rowdy (and somewhat bawdy) guttural Germanic anthems were clearly upsetting those of a more delicate constitution in Mill-ton on Kay-nes...
 But it's alright...here's a small but solid shieldwall to take care of things...no problems here then...
 Below...Leofric and crew... "OOOOHHHHHHHH>..'TWAS ON THE GOOD SHIP VENUS (hic!) YOU REALLY SHOUDHA SEEEEENNNNN USSSSSS (belch)...'Ere, lads, theresh some milksop (insert expletive) Briton cowardsh over there...Letsh..go geddum...BURP!!!!!
 Here come the levy in support....great...just what we need...bloody peasants to take on a bunch of thieving lagered up Saxons...this may not go so well!!!!
 So, out of role for a mo, this is how things looked at this point. I was in a right old muddle on my left, as the rocks were totally stalling my main advance and wrecking my formation. I clearly had significantly underestimated the impact of terrain on my army. I was reasonably confident of my right flank, although I suspected that Mike by now had a blinder of a fate deck. Mine was also good, but it would all come down to who got the key activation to use it. I had a Dragon Carpe Diem and some other cool stuff, but I suspected that Mike had something equally good...
 Below, Mike prepares to 'UNLEASH HELL!' Ok, wrong movie, but there aren't any decent quotes from the shite that was 'King Arthur' with that Owen bloke in it...
 Here we go...Mike plays 'goad' on my warriors on the far end of the shieldwall (so they can't help the levy in the fight) and launches a brutal Fate hand which I can only attempt to counter with my 'shieldwall braced' card... Bloody waste of time...zillions of hits...shock up at about 12 and only 4 levy alive...Amphora misplaced, running like soddery, taking a noble with them!!! Hmm...not a good start. The only good thing is that my warriors don't care and the noble should (fingers crossed) escape next turn, as he can activate himself away from the fleeing peasants. The key thing I learned here (apart from how good a decent Carpe Diem run is) is that combat is decided by group on group, not by the whole formation, so, although I lost the combat, it was only the levy who ran, beacuse they were the group who actually lost the fight! Important lesson learned and an error from last game claered up (one of many thus cleared up so far!)

 And get it I did. Lesson here twofold. DON'T break your British formations...DON'T leave your best unit high and dry without a noble, cos even they ain't that good...zillions of shock, amphora misplaced and that's them off and about to get kicked by the group Mike sent round the back of the baseline hill. Don't EVER let fleeing troops get charged... the enemy doubles their attack dice, so about 20 dice smacked into my commanipulares and only the champion fought back...sigh...lots of dead chaps and I was truly on the back foot!!
 At this point, my photography skills failed me (pics all blurred!! B*gger!) but I managed to turn the tables with a monster assault on p*ssed up Leofric and his two groups, playing a massive Carpe Diem hand of my own, slaughtering the heathens and securing the ford so that no more Saxons would advance there this day!! And Mike still hadn't found any loot!!! And his force morale was now as low as mine... A comeback of Lazarus-like proprtions was threatening...
Now it was on a knife edge, as my Lord activated and , with his warriors should have been in range to attack the Saxons who has seen off the commanipiulares and were threatening my rear. I rolled my dice...10" move...and the Saxons were...held breath... 10.25" away!!!!! NOOOOOOOOOOOOOO!!!!! I can't get 'em!!!! So now they activate and attack, but it's all holding even-stephen at the end of turn... Next turn YES!!!! British Lord activates.... Right, I have a card or two let's kick some....hang on...dastardly Mike plays a 'step forth' Fate card, allowing him to interrupt my activation, activate his Lord and rear charge my Lord and his warriors... This, as he has a Carpe Diem run, is NOT good!!!! And to make matters worse, his other gedriht FINALLY found a groat lurking in a p*ss-pot in a hovel in Mill-ton on Kay-nes. My force morale shot and game over!!!!!
Wow!! What a great fun game that was! On the edge til the last!! The rules lived up to (the very high) expectation via Rich's expert umpiring and a number of things that seemed very confusing before now felt much clearer. Bloody marvellous!!!! :-)
So, lessons: Well, several, really.
One: Terrain. It ain't your friend if you are British and trying to negotiate it. It adds shock ands breaks formations. What a Brit player needs to do is to ensure that there are some nice clear araes for his shieldwalls - hence the 'do a better job of your option shift two terrain pieces!'
Two: Formations: Keep 'em together where possible and keep your nobles in the right place - move 'em round the formations for best effect if necessary and keep the command and control up at top whack.
Three: Cards...the Fate deck gives you KILLER advantage, but for one round of combat only. make sure you use that killer combo at the right time in the right place.
Four: Never trust a Saxon - but we knew this already!!! :-)
As always, huge thanks to Mike who is a great opponent each and every time we play. And MAHOOSIVE thanks to Rich for trekking up to Peterborough and taking us through the rules. Not only is he a fine rule writer, but he's a jolly fine chap to boot!!!
Mike and I will start the campaign in early September...the battle for the kindom of Linnius begins!!!! :-)
I hope that you enjoyed the report...do check Mike's blog (it's in my blog list at the left of this page) and read his version of events. Oh, and go buy Dux Britanniarum and a bunch of Arthurian models and join in in the fun. It's really fabulous!!! More in about 3 weeks...
Right...first, we set up the terrain. This was interesting, as we rolled an unfathomably unusual set of dice resulting in the most terrain-heavy battlefield Rich had ever seen on a Dux Brit table. This was to be my undoing, as we shall see later, although I contributed to my own downfall by not taking advantage of the opportunity to move 2 terrain pieces at the start of the game...well, I did move two, but the wrong two and in the wrong direction..hey ho... Still, pretty looking table, isn't it? My Dark Age terrain is rather nice...


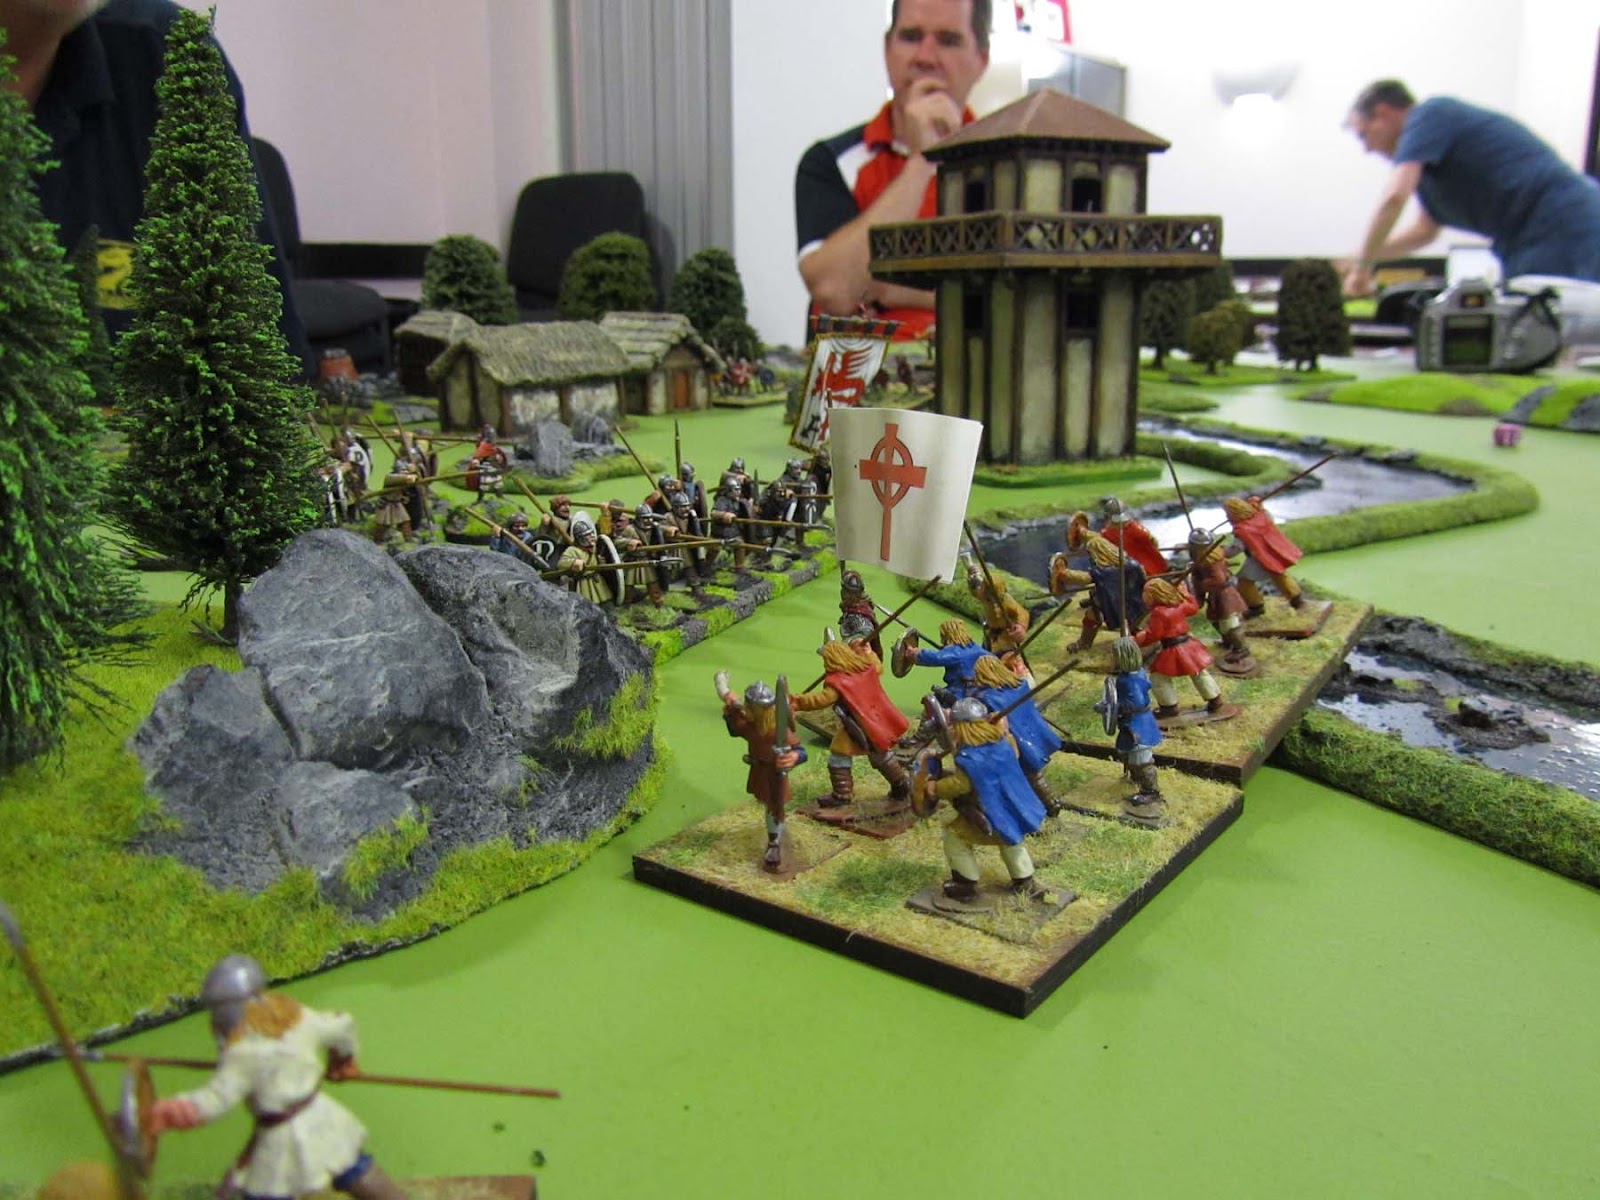
Here's Mike now being really dastardly! At this point, I had split the other shieldwall and sent my lord and commanipulares haring off to assault the Saxon gedriht rearguard (their mates were trying to loot Mill-ton on Kay-nes...unsuccessfully thus far, which is not surprising...nowt there worth having!!) However, Mike cannily played an evade card, leaving me high and dry and about to get it good and proper on Mike's terms rather than mine!! Bother and blast!!


Now it was on a knife edge, as my Lord activated and , with his warriors should have been in range to attack the Saxons who has seen off the commanipiulares and were threatening my rear. I rolled my dice...10" move...and the Saxons were...held breath... 10.25" away!!!!! NOOOOOOOOOOOOOO!!!!! I can't get 'em!!!! So now they activate and attack, but it's all holding even-stephen at the end of turn... Next turn YES!!!! British Lord activates.... Right, I have a card or two let's kick some....hang on...dastardly Mike plays a 'step forth' Fate card, allowing him to interrupt my activation, activate his Lord and rear charge my Lord and his warriors... This, as he has a Carpe Diem run, is NOT good!!!! And to make matters worse, his other gedriht FINALLY found a groat lurking in a p*ss-pot in a hovel in Mill-ton on Kay-nes. My force morale shot and game over!!!!!
Wow!! What a great fun game that was! On the edge til the last!! The rules lived up to (the very high) expectation via Rich's expert umpiring and a number of things that seemed very confusing before now felt much clearer. Bloody marvellous!!!! :-)
So, lessons: Well, several, really.
One: Terrain. It ain't your friend if you are British and trying to negotiate it. It adds shock ands breaks formations. What a Brit player needs to do is to ensure that there are some nice clear araes for his shieldwalls - hence the 'do a better job of your option shift two terrain pieces!'
Two: Formations: Keep 'em together where possible and keep your nobles in the right place - move 'em round the formations for best effect if necessary and keep the command and control up at top whack.
Three: Cards...the Fate deck gives you KILLER advantage, but for one round of combat only. make sure you use that killer combo at the right time in the right place.
Four: Never trust a Saxon - but we knew this already!!! :-)
As always, huge thanks to Mike who is a great opponent each and every time we play. And MAHOOSIVE thanks to Rich for trekking up to Peterborough and taking us through the rules. Not only is he a fine rule writer, but he's a jolly fine chap to boot!!!
Mike and I will start the campaign in early September...the battle for the kindom of Linnius begins!!!! :-)
I hope that you enjoyed the report...do check Mike's blog (it's in my blog list at the left of this page) and read his version of events. Oh, and go buy Dux Britanniarum and a bunch of Arthurian models and join in in the fun. It's really fabulous!!! More in about 3 weeks...
Wednesday, 15 August 2012
WAB 2.0 Age of Arthur Gaming Day in Peterborough
Here's advance notice of a WAB 2.0 Age of Arthur gaming day to be held in Peterborough on Sunday 25th November, being jointly run by me and Mike 'Trouble at t'Mill' Whitaker, ably assisted by a couple of our other club members.
It promises to be a typical WAB gaming day, full of good fun, great games and friendly gamers.
Details on the pic below, but please feel free to contact me personally if you want further info or if you wish to have a place reserved for you.
 Hope to see some of you there!
It promises to be a typical WAB gaming day, full of good fun, great games and friendly gamers.
Details on the pic below, but please feel free to contact me personally if you want further info or if you wish to have a place reserved for you.

Wednesday, 8 August 2012
First Game of Dux Britanniarum
Well, on Monday evening, I headed off to the wargames club to try out the Too Fat Lardies' super-looking new Arthurian rules, Dux Britanniarum.
Unfortunately, I had not had as thorough a read-through as I would have liked before the event and, as I am utterly pants at remembering any set of wargames rules I have played for years, let alone new ones with completely different systems, it was always going to be an 'interesting' evening!!
Mike, who is much better with such things, had been on hols, so hadn't even ordered the rules... This was not an auspicious start!!
So I picked a scenario I had the kit for (cattle raid) and off we went!!
We decided to roll up the characters, just to see what happened. In the event, not a lot, although I did gain 'Master of Arms' for my tribune, giving him an extra D6 in combat! Hurrah!!!
The scenario is played down a 6x4 table, short edge to short edge, with the Saxons getting D3 free moves with the cattle wot they had previously nicked from me before my advance guard arrived. Needless to say, Mike rolled high, maximising his free moves. My vanguard (D6 groups - I rolled a '4') and as many nobles as I wanted arrived in the centre section of the table on Mike's left, the remainder arriving on activation in turn 2. This meant I arrived roughly level with where Mike's thieving Saxons now were.
What followed was a comedy of errors as I tried desperately to get us through the game. I made numerous c*ck-ups, including misreading the severity of terrain, activating a noble twice in one turn and not activating another (doh!) and getting very confused over the Fate card deck and what happens when combats are won and lost, but despite this, Mike remained good-humoured and patient to the end...and still claimed he had fun!!!!! In the general mayhem, few pictures were taken (and the camera battery was getting low, to add insult to injury!) but we got through the game (somehow) and the Saxons won, despite taking a mauling along the way, getting 2 bases of cattle off the opposite short table edge by a masterstroke of tactical noble-activating (and a Saxon-friendly activation deck) at the end of the game.
So, how does it play?
Well, it's bloody great, that's what it is!!! I am a dyed-in-the-wool WABber and, apart from occasional games of Saga, Hail Caesar and Operation Squad, play little else, so this was VERY different! I love the card activation system! Basically, when your nobles' cards come up, they activate and can undertake as many activations as they have status points (so a warlord has 3, lesser mortals have 2) and they have a menu of 'stuff' to choose from as well as a command range (which is reduced when they are in combat.) This is great and is actually really easy to use. Troops not commanded by nobles get activated last. Seeemples!!!!
Movement is 3D6 (reduced by terrain, shieldwall, etc) and you MUST move what you roll unless you can give your troops a geographical reference point ("Move up in line with the Numeri...")
Combat is straightforward, although our movement trays being different meant that I made a slight error when leading this on Monday and morale is handled by troops receiving 'shock' when in combat or when moving through tricky terrain. Nobles can rally it off them as part of activation.
The real key to the game though is the Fate card deck. This is a set of special ability cards and I got this a LOT wrong on Monday. However, I now know where I went wrong and it is evident that this will lift the game to a whole new level as the cards can help you to REALLY kick ass in combat. Each noble can play a single card on any activation, or, if he holds a Carpe Diem card, can play multiple cards in one go...if in combat, he gains an extra D6 for every card he holds that corresponds to his 'suit' (Dragons for British; Boars for Saxons.) A player may play any unsuited card in response to the actibvating noble in any activation (e.g. when Mike played 'Aggressive Charge' to crush my shieldwall, I was able to play 'Shieldwall Braced' to cancel his advantage)
Deciding what to play when and what to hold back is going to be the Dux Brit equivalent of the battleboards in Saga, where choices of how to load and use the board are key to the game. I think this means that one could play each of the scenarios numerous times and never really get the same game twice!!!
So, overall, we liked it a lot and are playing again in two weeks (next week is ECW campaign week!) I can see this being one of my 'go to' games in future, I really can.
Pics below from the game:
First, evil, Pagan, thieving Saxons sneakin' off with good British beef and lamb!!! Not on my watch, Guvnor!!!
 Below, the result of an unfathomably good set of dice on my part!!! Considering you need 6s to kill Saxon Gedriht, I did well here! Shieldwalls negate the first kill on any group, so although Mike did kill a couple, these were in separate groups and the shieldwall saved them!!!
 Below, Saxons catch me out!! A unit of Numeri (levy) about to get mullared by the Saxon warriors. This was over in 2 turns...everybody dead bar the noble, who wisely legged it!! Lesson here: Levy wot ain't in shieldwall are sh*t!! Oh, and don't forget that groups can be activated more than once by different nobles...they can be a long way away and still get you!!!!
 Keep an eye on the blog for more, as I'll keep writing up the games as we play them. Overall though, this game is a winner!!!
Unfortunately, I had not had as thorough a read-through as I would have liked before the event and, as I am utterly pants at remembering any set of wargames rules I have played for years, let alone new ones with completely different systems, it was always going to be an 'interesting' evening!!
Mike, who is much better with such things, had been on hols, so hadn't even ordered the rules... This was not an auspicious start!!
So I picked a scenario I had the kit for (cattle raid) and off we went!!
We decided to roll up the characters, just to see what happened. In the event, not a lot, although I did gain 'Master of Arms' for my tribune, giving him an extra D6 in combat! Hurrah!!!
The scenario is played down a 6x4 table, short edge to short edge, with the Saxons getting D3 free moves with the cattle wot they had previously nicked from me before my advance guard arrived. Needless to say, Mike rolled high, maximising his free moves. My vanguard (D6 groups - I rolled a '4') and as many nobles as I wanted arrived in the centre section of the table on Mike's left, the remainder arriving on activation in turn 2. This meant I arrived roughly level with where Mike's thieving Saxons now were.
What followed was a comedy of errors as I tried desperately to get us through the game. I made numerous c*ck-ups, including misreading the severity of terrain, activating a noble twice in one turn and not activating another (doh!) and getting very confused over the Fate card deck and what happens when combats are won and lost, but despite this, Mike remained good-humoured and patient to the end...and still claimed he had fun!!!!! In the general mayhem, few pictures were taken (and the camera battery was getting low, to add insult to injury!) but we got through the game (somehow) and the Saxons won, despite taking a mauling along the way, getting 2 bases of cattle off the opposite short table edge by a masterstroke of tactical noble-activating (and a Saxon-friendly activation deck) at the end of the game.
So, how does it play?
Well, it's bloody great, that's what it is!!! I am a dyed-in-the-wool WABber and, apart from occasional games of Saga, Hail Caesar and Operation Squad, play little else, so this was VERY different! I love the card activation system! Basically, when your nobles' cards come up, they activate and can undertake as many activations as they have status points (so a warlord has 3, lesser mortals have 2) and they have a menu of 'stuff' to choose from as well as a command range (which is reduced when they are in combat.) This is great and is actually really easy to use. Troops not commanded by nobles get activated last. Seeemples!!!!
Movement is 3D6 (reduced by terrain, shieldwall, etc) and you MUST move what you roll unless you can give your troops a geographical reference point ("Move up in line with the Numeri...")
Combat is straightforward, although our movement trays being different meant that I made a slight error when leading this on Monday and morale is handled by troops receiving 'shock' when in combat or when moving through tricky terrain. Nobles can rally it off them as part of activation.
The real key to the game though is the Fate card deck. This is a set of special ability cards and I got this a LOT wrong on Monday. However, I now know where I went wrong and it is evident that this will lift the game to a whole new level as the cards can help you to REALLY kick ass in combat. Each noble can play a single card on any activation, or, if he holds a Carpe Diem card, can play multiple cards in one go...if in combat, he gains an extra D6 for every card he holds that corresponds to his 'suit' (Dragons for British; Boars for Saxons.) A player may play any unsuited card in response to the actibvating noble in any activation (e.g. when Mike played 'Aggressive Charge' to crush my shieldwall, I was able to play 'Shieldwall Braced' to cancel his advantage)
Deciding what to play when and what to hold back is going to be the Dux Brit equivalent of the battleboards in Saga, where choices of how to load and use the board are key to the game. I think this means that one could play each of the scenarios numerous times and never really get the same game twice!!!
So, overall, we liked it a lot and are playing again in two weeks (next week is ECW campaign week!) I can see this being one of my 'go to' games in future, I really can.
Pics below from the game:
First, evil, Pagan, thieving Saxons sneakin' off with good British beef and lamb!!! Not on my watch, Guvnor!!!


Subscribe to:
Posts (Atom)