Last night saw a fabulous event at Peterborough Wargames Club...The mighty 'Dux Britanniarum' himself, Lord Richard of Clarke, visited us to umpire a game of Dux Brit between Mike 'Trouble At' Mill' Whitaker and myself. An honoured guest indeed!!! And what a great time we all had!! Mike has already blogged his version of events. My mind is a bit hazy on the order of some of what happened as I was trying so hard (and managing!) to keep up with game mechanics as well as play and take pics, but here goes...
Right...first, we set up the terrain. This was interesting, as we rolled an unfathomably unusual set of dice resulting in the most terrain-heavy battlefield Rich had ever seen on a Dux Brit table. This was to be my undoing, as we shall see later, although I contributed to my own downfall by not taking advantage of the opportunity to move 2 terrain pieces at the start of the game...well, I did move two, but the wrong two and in the wrong direction..hey ho... Still, pretty looking table, isn't it? My Dark Age terrain is rather nice...

Below the first turn of the game. We rolled for a village raid...actually no...that;'s a lie...we fabricated the roll for a village raid, as we couldn't do a cattle raid cos we played it last time, we couldn't do a wagon train raid cos my wagons aren't painted...yada, yada, so Rich stepped in...a raid on a village it would be (the village of Mill-ton on Kay-nes. Apparently, the Saxons had tried to raid it before, but it had been closed...! Bizarrely, they had decided to have another bash...contrary, these Germanic types!) Anyway, Mike rolled a 'one' for how many turns start he got in his attempt to loot Mill-ton on Kay-nes and I rolled a 4 bringing me on at the far end of the table (b*gger!), although mercifully in a space devoid of too much terrain!

Below my army at the end of turn 2, with the remaining troops catching up with my vanguard. My plan was to use my best troops to tackle the threat to the village and the rest to screen off the ford, as some Saxons were trying to sneak round that way...canny blighters!
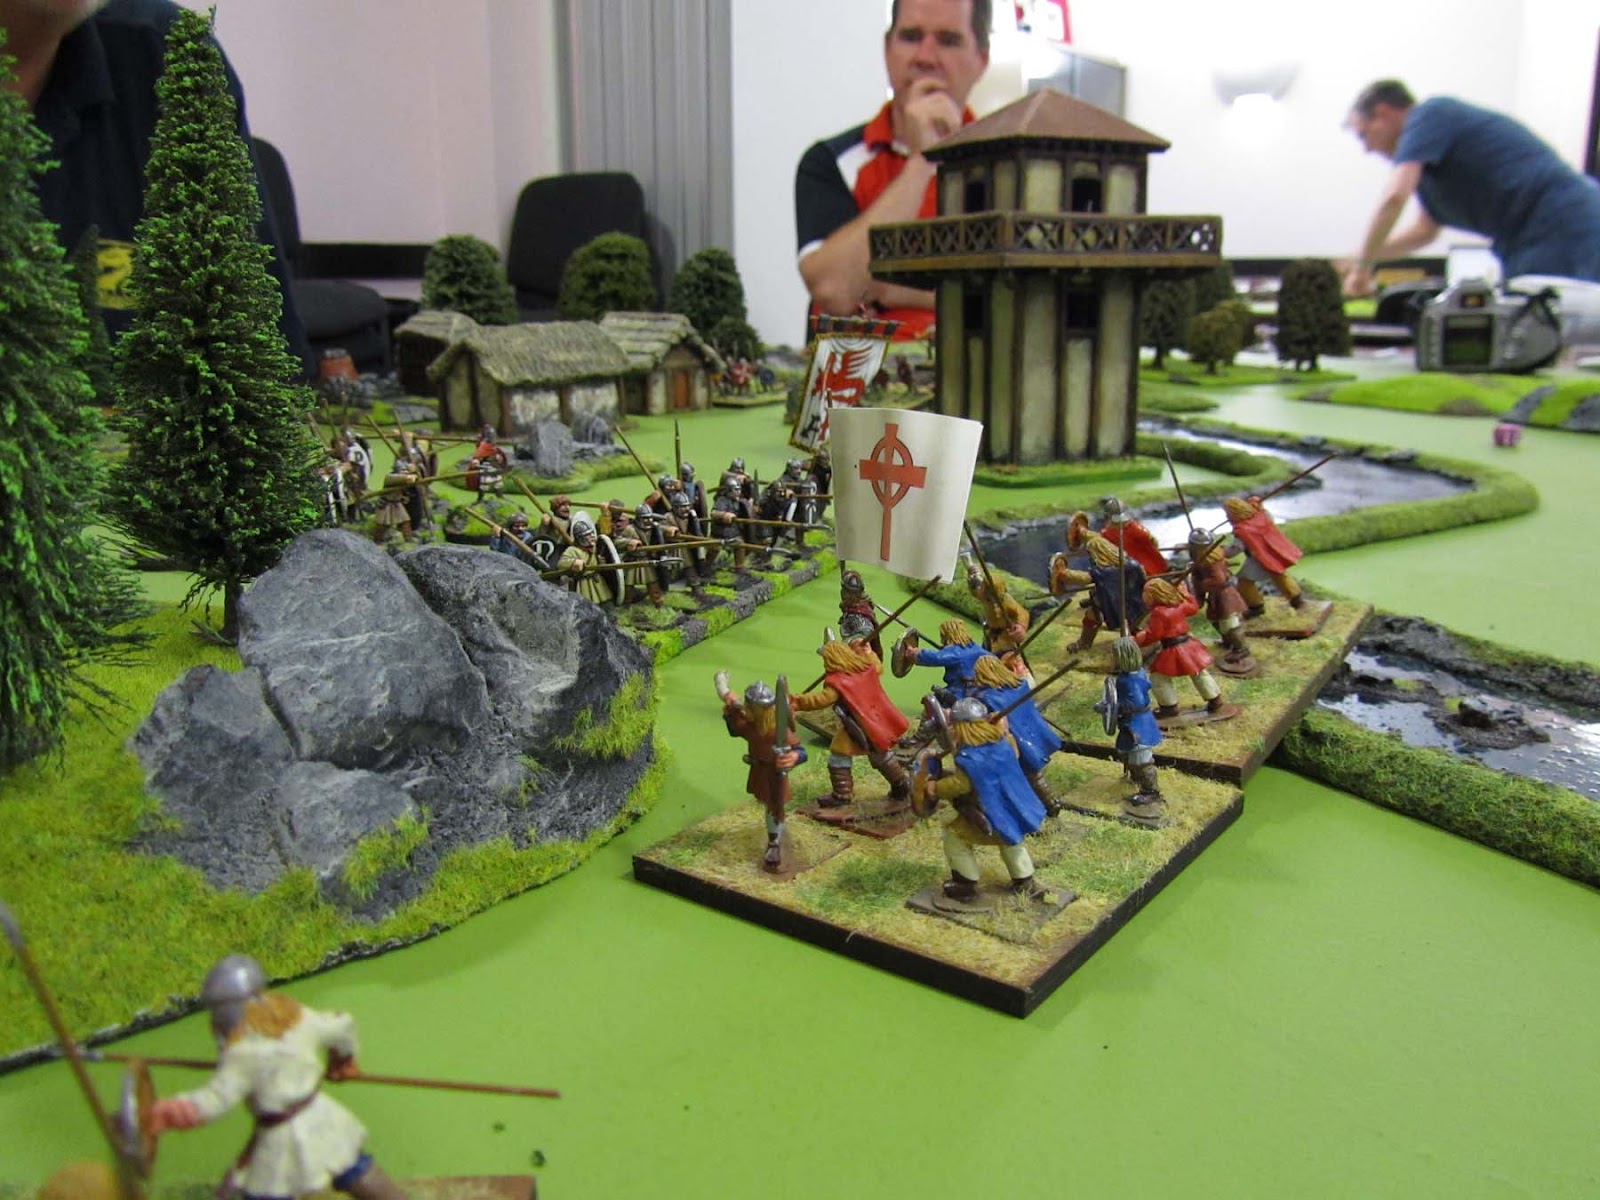
And here they come...sneakin'...led by some drunkard called Leofric, whose rowdy (and somewhat bawdy) guttural Germanic anthems were clearly upsetting those of a more delicate constitution in Mill-ton on Kay-nes...
But it's alright...here's a small but solid shieldwall to take care of things...no problems here then...
Below...Leofric and crew... "OOOOHHHHHHHH>..'TWAS ON THE GOOD SHIP VENUS (hic!) YOU REALLY SHOUDHA SEEEEENNNNN USSSSSS (belch)...'Ere, lads, theresh some milksop (insert expletive) Briton cowardsh over there...Letsh..go geddum...BURP!!!!!
Here come the levy in support....great...just what we need...bloody peasants to take on a bunch of thieving lagered up Saxons...this may not go so well!!!!
So, out of role for a mo, this is how things looked at this point. I was in a right old muddle on my left, as the rocks were totally stalling my main advance and wrecking my formation. I clearly had significantly underestimated the impact of terrain on my army. I was reasonably confident of my right flank, although I suspected that Mike by now had a blinder of a fate deck. Mine was also good, but it would all come down to who got the key activation to use it. I had a Dragon Carpe Diem and some other cool stuff, but I suspected that Mike had something equally good...
Below, Mike prepares to 'UNLEASH HELL!' Ok, wrong movie, but there aren't any decent quotes from the shite that was 'King Arthur' with that Owen bloke in it...

Here we go...Mike plays 'goad' on my warriors on the far end of the shieldwall (so they can't help the levy in the fight) and launches a brutal Fate hand which I can only attempt to counter with my 'shieldwall braced' card... Bloody waste of time...zillions of hits...shock up at about 12 and only 4 levy alive...Amphora misplaced, running like soddery, taking a noble with them!!! Hmm...not a good start. The only good thing is that my warriors don't care and the noble should (fingers crossed) escape next turn, as he can activate himself away from the fleeing peasants. The key thing I learned here (apart from how good a decent Carpe Diem run is) is that combat is decided by group on group, not by the whole formation, so, although I lost the combat, it was only the levy who ran, beacuse they were the group who actually lost the fight! Important lesson learned and an error from last game claered up (one of many thus cleared up so far!)

Here's Mike now being really dastardly! At this point, I had split the other shieldwall and sent my lord and commanipulares haring off to assault the Saxon gedriht rearguard (their mates were trying to loot Mill-ton on Kay-nes...unsuccessfully thus far, which is not surprising...nowt there worth having!!) However, Mike cannily played an evade card, leaving me high and dry and about to get it good and proper on Mike's terms rather than mine!! Bother and blast!!
And get it I did. Lesson here twofold. DON'T break your British formations...DON'T leave your best unit high and dry without a noble, cos even they ain't that good...zillions of shock, amphora misplaced and that's them off and about to get kicked by the group Mike sent round the back of the baseline hill. Don't EVER let fleeing troops get charged... the enemy doubles their attack dice, so about 20 dice smacked into my commanipulares and only the champion fought back...sigh...lots of dead chaps and I was truly on the back foot!!
At this point, my photography skills failed me (pics all blurred!! B*gger!) but I managed to turn the tables with a monster assault on p*ssed up Leofric and his two groups, playing a massive Carpe Diem hand of my own, slaughtering the heathens and securing the ford so that no more Saxons would advance there this day!! And Mike still hadn't found any loot!!! And his force morale was now as low as mine... A comeback of Lazarus-like proprtions was threatening...
Now it was on a knife edge, as my Lord activated and , with his warriors should have been in range to attack the Saxons who has seen off the commanipiulares and were threatening my rear. I rolled my dice...10" move...and the Saxons were...held breath... 10.25" away!!!!! NOOOOOOOOOOOOOO!!!!! I can't get 'em!!!! So now they activate and attack, but it's all holding even-stephen at the end of turn... Next turn YES!!!! British Lord activates.... Right, I have a card or two let's kick some....hang on...dastardly Mike plays a 'step forth' Fate card, allowing him to interrupt my activation, activate his Lord and rear charge my Lord and his warriors... This, as he has a Carpe Diem run, is NOT good!!!! And to make matters worse, his other gedriht FINALLY found a groat lurking in a p*ss-pot in a hovel in Mill-ton on Kay-nes. My force morale shot and game over!!!!!
Wow!! What a great fun game that was! On the edge til the last!! The rules lived up to (the very high) expectation via Rich's expert umpiring and a number of things that seemed very confusing before now felt much clearer. Bloody marvellous!!!! :-)
So, lessons: Well, several, really.
One: Terrain. It ain't your friend if you are British and trying to negotiate it. It adds shock ands breaks formations. What a Brit player needs to do is to ensure that there are some nice clear araes for his shieldwalls - hence the 'do a better job of your option shift two terrain pieces!'
Two: Formations: Keep 'em together where possible and keep your nobles in the right place - move 'em round the formations for best effect if necessary and keep the command and control up at top whack.
Three: Cards...the Fate deck gives you KILLER advantage, but for one round of combat only. make sure you use that killer combo at the right time in the right place.
Four: Never trust a Saxon - but we knew this already!!! :-)
As always, huge thanks to Mike who is a great opponent each and every time we play. And MAHOOSIVE thanks to Rich for trekking up to Peterborough and taking us through the rules. Not only is he a fine rule writer, but he's a jolly fine chap to boot!!!
Mike and I will start the campaign in early September...the battle for the kindom of Linnius begins!!!! :-)
I hope that you enjoyed the report...do check Mike's blog (it's in my blog list at the left of this page) and read his version of events. Oh, and go buy Dux Britanniarum and a bunch of Arthurian models and join in in the fun. It's really fabulous!!! More in about 3 weeks...


8 comments:
*grin* Cracking account - interesting to see it from your side (and dear lord I need to keep losing weight :D)
I think we'll definitely keep this set of characters for the campaign - they seem to have already acquired some personaliy - at least, mine have.
Great report and splendid pics Mr H. Very enjoyable indeed.
I note that having RC on hand to explain the rules clearly helped which is my only (slight) reservation about the rules at the mo. Some of the wording is a little confusing. When I get around to playing it 'proper-like'. I shall probably post a few Q's on the LARD blog or forum.
Looking forward to the campaign reports!
Matt
Good batrep and nice piccies to go with it.
Always nice to have the author umpire a game for you. Nice.
Thanks for the report, useful as I'm looking get into Dux Brit along with others t'club so good to see a fun game.
Very nice writeup Andy !!!
Thnaks for sharing !
Best regards Michael
Excellent AAR, interesting to read theother side of the hill. Very nice scenery guys
Glad you enjoyed it Matt! Ref clarity of rules, etc, you need to go to the Lard Island blog (you can access it from the Lardies' website) as Rich has posted some design notes on there which help immensely! I copied and pasted the whole lot to Word and keep it in my rule book...
Also, the Lardies' Yahoo group is recommended (and I don't really like Yahoo groups much) as Rich replies to all rules queries on there very promptly.
Key points that may help initially:
1. No group can be activated to move more than once per turn (i.e. per play through of the main card deck)This doesn't seem to be written in the rules (I haven't spotted it, but may justbe being a bit 'blind' to it), but is key to the game working.
2. No noble may activate troops already commanded (i.e. accompanied) by the warlord, although he may order troops commanded by lesser nobles (chain of command, dontcha know...)This isn't actually in he rules eiother as far as I can see...
3. Combat result is worked out per group, not per formation.
Cheers
Andy
Thanks for kind comments one and all... :-)
Good summary of the lost rules Andy!
I couldent either find these rules in the book and they are quite esential to the game...
Maybe Rich will come over to Sweden for a clarificaton game to;)
The rules migth be up-dated in the second edition:) could we hope for a hardback book to then...
Best regards Michael
Post a Comment